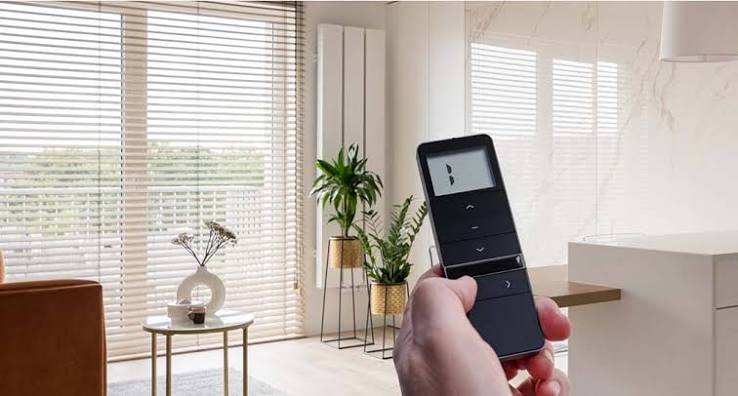
Motorized window coverings are no longer a luxury reserved for new builds. Homeowners are adding electric blinds to bedrooms, living rooms, and kitchens without opening walls or upending their schedules. The challenge is not simply picking a fabric or a remote. Success hinges on three practical choices that interact with each other: how the motor gets power, how you control it daily, and how the blind is engineered for a specific window. This article explains the tradeoffs and pitfalls that appear when you retrofit, including power options, control protocols, torque requirements, and tricky openings like skylights and bi-fold doors.
- Power Choices: Battery, Solar Assist, or a Discreet Hardwire
For most finished rooms, you will weigh rechargeable battery packs against a concealed hardwired feed. Battery motors suit light to medium roller shades and modest daily use. Expect to recharge every few months, sooner on large widths or blackout fabrics that add weight and friction. Solar trickle chargers can extend intervals on south- or west-facing openings, especially for skylights. Hardwiring is the better choice where blinds move several times a day, cover wide spans, or use heavier materials. If you are still comparing local options, a search for electric blinds in Southampton will surface examples of both approaches and the kinds of rooms they fit.
Wires can be hidden behind a pelmet or inside a cassette headbox, then dropped in a short channel to a nearby supply. A discreet spur or outlet above the window often avoids visible cabling. If walls cannot be chased, a color-matched surface conduit along the frame line keeps things tidy. Avoid driving fasteners into hollow uPVC without reinforcement blocks, and plan access for future motor replacement. Overlooking cable routing is a common mistake that results in visible leads or awkward service panels later.
- Control Layers: Handsets, Wall Switches, and Smart Home Protocols
Handheld remotes are quick to deploy, especially with radio frequency motors using 433 MHz or proprietary RTS-style signals. A single handset can run channels for “All,” “Room,” or “Window” to move groups in sync. Wall switches help in high-traffic spaces where a remote might wander. For automation, consider a bridge or hub that exposes blinds to platforms such as Alexa, Google Assistant, Apple Home, or Matter via Zigbee, Z-Wave, or WiFi. Each protocol trades convenience for complexity: WiFi hubs are easy to set up but depend on network reliability, while Zigbee and Z-Wave create resilient meshes but require a compatible coordinator.
Add timers or light sensors only where they solve an actual problem, like early morning glare on a home office screen. RF signals can struggle through dense masonry, so position hubs centrally or use repeaters. Preserve a local fallback: pair at least one handset or wall switch for each room. That way blinds still run if your phone battery dies or the internet drops. If you prefer precise slat alignment on multiple venetian or day and night shades, look for motors with step counting or feedback so scenes consistently match.
- Measuring and Load: Tube Diameter, Torque, and Fabric Selection
A blind that looks right on paper can fail in practice if the motor is underspecified. Torque, measured in newton meters, must overcome the combined load of the fabric, bottom bar, and roller inertia. Wider widths, tall drops, and high-friction blackout textiles push torque needs upward. A common retrofit pitfall is pairing a compact 35 mm tube with a heavy fabric, causing the tube to deflect and the fabric to telescope. Upgrading to a 45 mm or 55 mm tube stiffens the roller and reduces strain on the motor.
Mounting choices affect performance too. Inside recess installs need enough depth to clear the cassette and brackets without fouling window handles. Side channels can reduce light bleed but add friction; size motors accordingly. Blackout fabrics improve sleep but increase weight and rolling diameter, which can demand a larger headbox. In bright living areas, consider screen fabrics with a 3 to 5 percent openness. They cut glare while preserving outward views, and their lighter weight eases motor load compared to laminated blackout cloth.
- Window Situations That Complicate the Retrofit
Bi-fold and sliding doors often require multiple narrow blinds instead of one wide span. Aligning bottom bars and running them together via group control delivers a neat look; however, each panel adds cost and charging overhead if you use batteries. Where door leaves stack behind a pelmet, confirm the cassette clears the track and hinge hardware. For wide recesses, a center support bracket may be needed to prevent tube sag, which can otherwise cause uneven rolling and rub marks.
Skylights and roof windows introduce gravity and heat. Tensioned or zip-guided systems keep fabric taut overhead and resist drafts. Power is the sticking point: a solar-assisted battery makes sense where running a cable means cutting into insulated ceilings. In bay windows, angles can crowd brackets and expose gaps. A slight outside mount with a continuous pelmet can unify three blinds visually and block corner light leaks. Always check reveal depth around radiators and tile returns in bathrooms so cassettes seat flush.
- Noise, Safety, and Everyday Use
Noise is rarely listed on spec sheets, yet it shapes satisfaction. Larger motors often run slower and quieter under the same load, while a small motor near its limit can whine and heat up. Look for soft start and soft stop features to reduce clatter at limits, and verify thermal protection so a stalled blind does not cook its windings. Child safety improves by default with cord-free operation, but confirm any exposed chains on linked systems have compliant breakaway connectors.
Plan how you will live with the blinds day to day. Set intermediate positions, like a 30 percent drop for glare control, during commissioning to avoid constant nudging. For media rooms, a wall scene controller makes one-touch dimming practical. If you integrate voice assistants, name blinds by room and window orientation rather than “Blind 1” and “Blind 2,” which people forget. Where privacy matters at dusk, add an automation that closes street-facing blinds at sunset and opens them at wake time.
Aftercare: Limits, Charging, and Small Fixes That Prevent Big Headaches
Good aftercare starts at setup. Calibrate upper and lower limits so the fabric never slams into the cassette or binds on the sill. On battery systems, note a first full charge date and track usage; a simple quarterly reminder avoids a flat pack right before guests arrive. Dust fabrics with a soft brush and spot clean per the textile label to prevent stiffening that increases motor load. If a blind drifts out of square after months of use, check that brackets are still tight and that the tube has not migrated laterally; many rollers have spacers or collars that can be nudged back.
Smart hubs and apps also need periodic attention. Update firmware during the day, not right before an event. If schedules misfire after a time change, resync sunrise and sunset automations. For hardwired installations, label isolators and keep a photo of cable routes for future trades. When adding new blinds later, revisit group scenes so everything rises and falls predictably. Retrofitting works best when power, control, and mechanics are treated as one system. A careful plan at the start reduces visible wires, sizes the motor correctly, and yields a blind that moves quietly and reliably long after the novelty wears off.