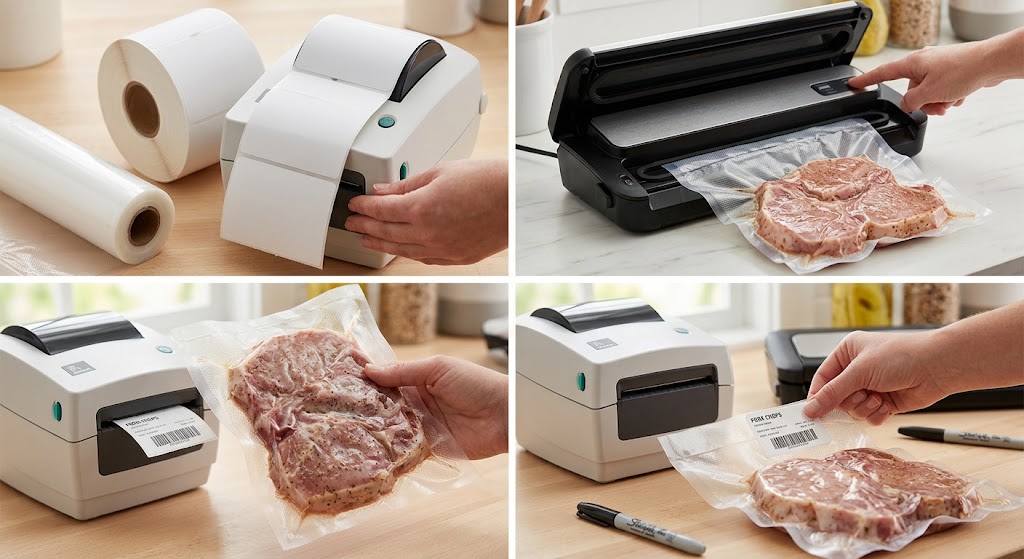
Label the outside of a vacuum-sealed food pack only after deciding what the label must survive: sealing, chilling or freezing, storage, transport, and retail or kitchen handling. The smooth film may look easy to label, yet folds, condensation, and changing package shape can lift an edge or distort a barcode. Direct thermal printing is useful for variable lot and date information when the stock is qualified for the required life. Food information, contact suitability, and date rules must be approved by the responsible food business for the markets where the pack will be sold.
Choose a flat zone on the finished pack
An empty pouch is not a reliable placement guide. Once product is vacuum sealed, its contours can pull the film into ridges. Place the label on a broad smooth outer area away from the heat seal, opening notch, or fold. Do not bridge a seam or cover a visible seal inspection area. If no flat zone remains, use an outer sleeve, header card, or carton that can carry the variable label. Test the smallest and most irregular product shapes in the range.
Keep the label outside the food-contact surface unless the specific material and intended use have been reviewed for contact. A generic phrase such as “food-safe label” is not enough to establish suitability. The U.S. FDA, for example, treats some packaging components and adhesives that contact food as food-contact substances; other markets have their own rules. Ask the packaging compliance owner to approve the construction rather than relying on a shipping-label supplier for legal interpretation.
Define the exact temperature sequence
The pack may be labeled before chilling, after chilling, or after freezing. Adhesive application temperature is different from the temperature a bonded label can later withstand. A warm dry pouch labeled before refrigeration may work well, while the same sticker pressed onto a cold wet pouch may not establish a bond. Write down the film type, application temperature, moisture condition, lowest storage temperature, and required readable period. Send that sequence to the label supplier.
If condensation forms after the pack leaves cold storage, test through that transition. Water can wet an uncoated paper face and create glare or lifting at the edges. A top-coated stock or a different application point may help, but neither should be assumed to solve a wet adhesive interface. Sometimes the most reliable process change is to label the dry outer package before chilling.
Keep variable information tied to the batch
Lot, pack date, use-by date, weight, and product name may be printed at different stages. Define which system supplies each field and which version of the rule applies to the specific product. Print a first-off label after each recipe, lot, or date change and compare it with the production record. A clear barcode cannot compensate for yesterday’s date template. Retire obsolete layouts so staff cannot accidentally select them during a busy shift.
If a pack is reworked or repacked, preserve its traceability relationship. Do not print a fresh lot merely to make the outside label neat. Record the physical event, approve the new date or lot rule where needed, and remove obsolete information before release. The actual contents and their history should be recoverable from the printed code.
Print for the intended scanner
A product scanned at retail may need a different symbol and placement from a case scanned only in a warehouse. Confirm the receiving or retailer specification. Keep the required quiet zone clear, use a high-contrast background, and avoid printing a code over a transparent panel where dark product behind it changes apparent contrast. Test the filled pack under the scanner and lighting conditions in which it will be used.
When comparing food packaging thermal labels, request production-roll samples for the exact printer and pouch film. A full roll trial can reveal registration or feed issues that loose labels cannot show. Check whether a long product name or lot number pushes the barcode toward the die-cut edge. A label that technically fits in the design file may clip in production.
Run an end-to-end test
Pack the most difficult product shapes, apply labels at the actual line speed, and follow them through chilling or freezing, case packing, transport, and display. Inspect adhesion, paper damage, print legibility, and barcode reads at each stage. Include packs from every pouch supplier if film varies. Record failures by pouch type and application timing rather than averaging everything into one success percentage.
Test handling by people as well as scanning. Workers may grip a pack exactly where the label sits, or stack packs so one edge rubs another. If failures occur only after a particular process step, inspect that step before changing every label. A supplier of direct thermal labels can advise on stock choices, but the approval decision should use your real package and recorded pass criteria.
When to choose a different method
If the label must remain readable for a long frozen shelf life, repeated wet handling, strong cleaning agents, or bright retail display, standard direct thermal paper may not be enough. Compare a qualified coated grade and, if necessary, thermal transfer or preprinted packaging. Do not add tape across a weak barcode without a scan trial; glare and wrinkles can make it worse. Do not increase printer darkness until bars swell and quiet zones shrink.
The right choice is the least complex construction that remains legible and attached for the required period, meets the applicable packaging requirements, and scans in the real workflow. Document the approved pouch, label, printer settings, date template, and test results together so a later packaging substitution receives the same scrutiny.
Confirm variable data at each changeover
Before the first pack of a new batch, have the operator compare the printed product name, lot, date, and any required warning text with the authorized production record. Inspect a sample after vacuum sealing, not only a flat unused pouch. Repeat the comparison after a roll change, printer restart, or product changeover. If a code becomes unreadable only after sealing, move the label to a stable panel or label the finished pack; increasing print heat may not address the deformation. Keep failed examples with the batch record so quality staff can distinguish a layout issue from incorrect product data. Local food-label rules vary, so required wording and dates should be approved by the responsible compliance team.